 STITCH ROUND
 Build a stitched cat doll amigurumi from ring to finish
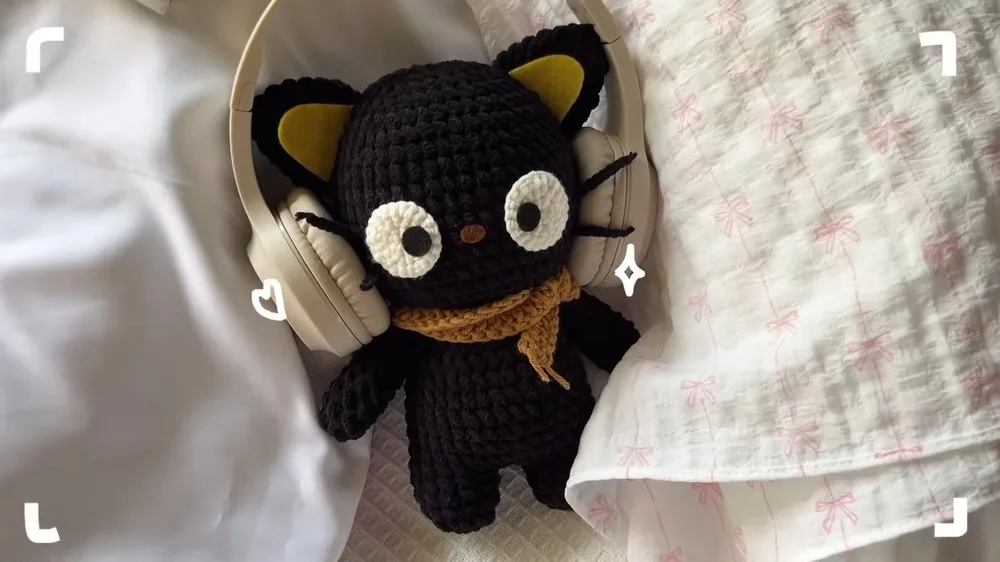
Six parts, up to nine rounds each, shape a stuffed cat doll amigurumi with ears, body and hands.
- Skill
- Intermediate
- Rounds
- 12 rounds
- Yarn weight
- Bulky
- Hook
- 4 mm
- Time
- 4-6 hours

Intermediate
What the original page called it. Nothing here is graded a second time.

12 rounds
Each one gets its own line, with a box beside it to tick as you go.

Bulky
What the sample was made in. Any weight works — the size moves with it.
About this pattern
This cat doll amigurumi breaks into six pattern parts, each one a manageable session on its own. The main pattern starts from a ring and climbs through single crochet rounds up to round 9. Legs come next, made twice with three rounds apiece, followed by a two-round body base, two ears, and a three-round head continued straight off the body. A close-hand step finishes the small pieces before assembly.
The shaping load sits in the increase rounds and the join. Legs pick up stitches fast on round 2, so slow down there to keep the increase pattern even before working the plain rounds that follow. The body's round 2 mixes two increases with a single increase in one pass, and the later rounds taper the shape back down. That taper and the chain-2 leg join are the two spots where careless counting shows.
- Work the main pattern piece from a ring through several single crochet rounds.
- Make two legs from separate magic rings, increasing once before working the plain rounds.
- Leave the second leg unfastened and chain across to join both legs into the body base.
- Increase around the joined body, then work even rounds before tapering the top.
- Crochet two ears and attach them once the head rounds are complete.
- Fold each hand flat and single crochet through both layers to close it before fastening off.
What goes wrong
- Miscounting the leg increase round Place a stitch marker at the start of round 2 on each leg and check the increase pattern before moving to the plain rounds.
- Uneven chain join between legs Keep the chain-2 join snug and consistent on both sides so the body starts round with no gap at the join.
- Hand closes crooked or gapped Fold the hand flat and work through front and back loops together in one pass rather than closing loop by loop.
- Gluing felt features before stuffing Wait until the head is fully stuffed and shaped, then glue the felt pieces so the face sits flat instead of puckering.
Yarn, hook and the rest
Copied from the source pattern's own materials list.
- Thick shealan yarn
- 4 mm crochet hook
- Stitch marker
- Stuffing material
- Yarn needle
- Black, yellow, brown felt cloth for facial features
- Glue
- Milk cotton yarn for the scarf and demonstration
Progress tracker
0 of the 12 rounds on this page are ticked.
The pattern, round by round
Kept in the order and the wording the source used. Tick a round as you finish it; the ticks stay on this device.
Main Pattern
Round 1
6 SC into ring. For Round 2: 1 SC in the first stitch, increase in the next stitch repeat 3 times (9 SC).
Rounds 3–9
1 SC in each stitch around (9 SC).
Legs (Make 2, but do not fasten off after the second leg)
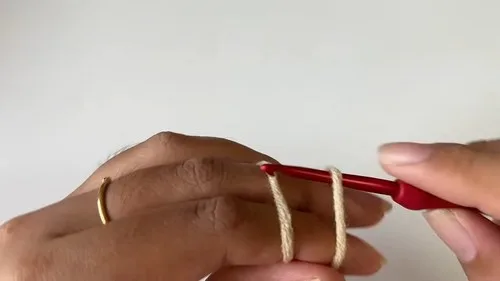
Start with a magic ring.
Round 1
7 SC into ring.
Round 2
Increase in each stitch around (14 SC).
Rounds 3–4
SC in each stitch around (14 SC).
Body
After the second leg, chain 2 to join.
Round 1
Alternate making SC in stitches around each leg and in chain 2 space (32 SC).
Round 2
14 SC, 2 increases, 15 SC, 1 increase (35 SC). For Round 3-8: SC in each stitch around (35 SC).Round 9 - 10: Repeat decreasing pattern as described in the instructions for a tapered body shape.Attach hands by crocheting them together with the body as described.
Ears (Make 2)
Start with a magic ring.
Round 1
6 SC into ring.
Round 2
Increase in each stitch (12 SC). Follow the instructions for shaping and closing each ear. Sew ears to the head.
Details (Eyes, Nose, Whiskers, and Scarf): Crochet the eyes separately and attach them to the head.
Cut out felt pieces for the nose and eyes; glue them on.
Create whiskers with black yarn as described.
Crochet a scarf and wrap it around the cat's neck.
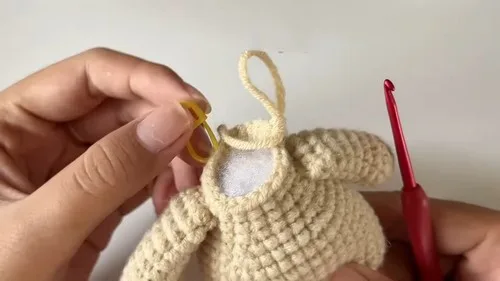
Head (Continued from Body)
Round 13
Increase to 40 SC.
Rounds 14–25
Shape the head by following the described pattern, including increases and SC in each stitch.
Rounds 26–32
Decrease as instructed to shape the top of the head. Stuff the head firmly. Close the top using a yarn needle.
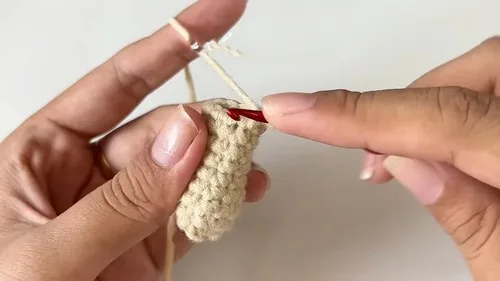
Close Hand
Fold hand flat; crochet through both the front and the back stitches to close, making 4 SC across.
Fasten off, leaving a tail for sewing.
Check your count
- Main Pattern · Round 1: 9 sts
- Main Pattern · Rounds 3–9: 9 sts
- Legs (Make 2, but do not fasten off after the second leg) · Round 2: 14 sts
- Legs (Make 2, but do not fasten off after the second leg) · Rounds 3–4: 14 sts
- Body · Round 1: 32 sts
- Body · Round 2: 35 sts
Finish
- Weave in tails from the main pattern, ears, and hands as each piece comes off the hook, rather than leaving them until the end.
- Stuff the legs and body as they're built, packing firmly before the tapering rounds pull the opening closed.
- Glue on the felt facial features and attach the ears and hands to the head and body once stuffing is done.
Bigger or smaller
- Smaller
- Drop to a lighter yarn and a smaller hook than the 4 mm called for; the same round-by-round shaping produces a smaller, denser doll.
Photographs of this one
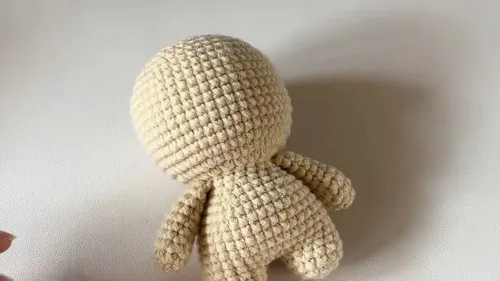
Every photograph on this page was taken by whoever published the pattern, and they are printed in the order the source listed them.
FAQs
Asked and answered
These answers came from whoever first published the pattern, kept word for word.
What yarn and hook does this pattern call for?
Thick shealan yarn with a 4 mm hook makes the doll's parts, while milk cotton yarn covers the scarf. Both yarn types are worked with the same hook throughout.
How is the hand closed at the end?
Fold the hand flat and crochet through both the front and back stitches together to seal it in one pass. This closes the opening and sets up the tail for sewing.
Do the legs need to be fastened off before starting the body?
No. The pattern only fastens off after the first leg; the second leg stays live so the chain-2 join and body can follow directly.
How are the face details added?
Black, yellow, and brown felt cloth pieces are cut and glued on rather than crocheted or embroidered. Add them after the head is stuffed and shaped.