 STITCH ROUND
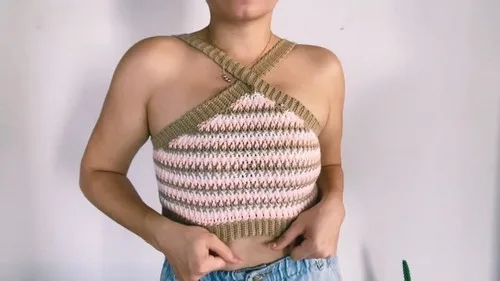
 Crochet alpine top pattern with textured front post stitch
Tick off seven rounds of alpine stitch to crochet a fitted top with straps and a cord.
- Skill
- Intermediate
- Rounds
- 11 rounds
- Yarn weight
- Worsted
- Hook
- 4 mm
- Time
- 4-6 hours

Intermediate
What the original page called it. Nothing here is graded a second time.

11 rounds
Each one gets its own line, with a box beside it to tick as you go.

Worsted
What the sample was made in. Any weight works — the size moves with it.
About this pattern
This top comes together across three parts to tick off: the Main Pattern body at 7 rows, two matching Straps at 2 rows each, and a Cord worked in 2 rows. The body carries the textured alpine stitch, the straps close the shoulders, and the cord threads through the hem to cinch it in. Each part is short enough to check off in one sitting before moving to the next.
The alpine stitch row is where the texture forms, alternating a regular double crochet with a front post double crochet wrapped around the stitch below. Slow down through the bust decrease rows, where stitches pair off at both edges until the top narrows to a single point. Keep the stitch markers in place at the marked decrease spots so both sides shrink evenly.
- Lay down the base fabric with a row of double crochet followed by a row of single crochet.
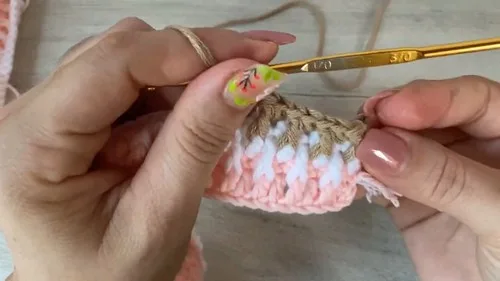
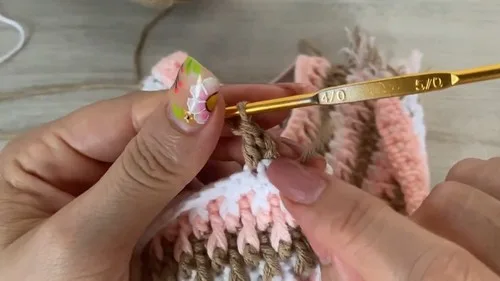
- Work the alpine stitch row, wrapping front post double crochet around the previous row's double crochet for texture.
- Alternate the alpine stitch row with a plain single crochet row to build up the body of the top.
- Narrow both edges with paired decreases at the bust point until the fabric comes to a single point.
- Crochet two matching straps separately, slip stitching along the top edge and working the back loops only.
- Chain and double crochet a narrow cord, then assemble by sewing on the straps and threading the cord through.
What goes wrong
- Wrapping front post stitches around the wrong row Check that the front post double crochet wraps around the double crochet from the row directly below, not the single crochet row. Pause at the start of each alpine stitch row to confirm placement before working across.
- Decreasing without marking the bust point Place the stitch markers at the measured decrease points before starting to narrow the sides. Skipping this step makes it easy to decrease unevenly on each edge.
- Twisting the strap while working back loops only Slip stitch across the top of the piece, skip those slip stitches, then turn before working into back loops only. Working into the wrong loop flips the strap's right side.
Yarn, hook and the rest
Copied from the source pattern's own materials list.
- Copito yarn (100% acrylic, 6 strands)
- 4mm crochet hook
- Scissors
- Stitch markers
- Yarn needle
Progress tracker
0 of the 11 rounds on this page are ticked.
The pattern, round by round
Kept in the order and the wording the source used. Tick a round as you finish it; the ticks stay on this device.
Main Pattern
Row 1
Make a slip knot; chain 124; add 2 more chains to turn; double crochet in the 3rd chain from the hook; continue double crocheting across the row.
Row 2
Chain 1 and turn; single crochet in each stitch across.
Row 3
Alpine Stitch Row Chain 2 and turn; double crochet in the first stitch; front post double crochet in the next stitch (around the double crochet from the previous row); alternate between regular double crochet and front post double crochet across; end the row with a regular double crochet.
Row 4
(Repeat): Chain 1 and turn; single crochet across; change yarn color at the end if desired; continue alternating alpine stitch rows and single crochet rows; work until you complete 20 rows (or more for added length).
Row 5
Decreasing for the Bust (Decreasing for the Bust): Measure 15 cm from each edge and place stitch markers; at the start and end of each row, crochet two stitches together; on single crochet rows, decrease once at each end; repeat until one double crochet remains at the top point.
Row 6
Bottom Edge Single crochet along the bottom edge of the top.
Row 7
Cord Holes Chain 1 and turn; create a pattern of single crochets and chain spaces to form holes for the cord.
Straps
Row 1
Attach yarn at the top corner; chain 8; single crochet into the second chain from the hook and across. (7 sc)
Row 2
(Repeat for 54 rows or until desired length ~30 cm): Slip stitch into the next 2 stitches on the top of the piece; turn, skip slip stitches, and single crochet in back loops only across. (7 sc)
Cord
Row 1
Chain 5; double crochet in the 3rd, 4th, and 5th chains from the hook.
Row 2
(Repeat until cord measures about 120 cm): Chain 2, turn, and repeat double crochets.
Join
Step 1Fold the end of the strap and sew to the back of the top.
Step 2Repeat for the other strap.
Step 3Weave the cord through the holes at the bottom.
Step 4Weave in all loose ends securely.
Check your count
- Straps · Row 1: 7 sts
- Straps · Row 2: 7 sts
Finish
- Weave in every loose end left from color changes and from finishing each separate part with a yarn needle.
- Fold the end of each strap and sew it to the back of the top, matching strap to strap.
- Thread the finished cord through the holes along the bottom edge and lightly block the piece to settle the alpine stitch texture.
Bigger or smaller
- Larger
- Move up to a bigger hook or a heavier yarn weight than Copito to scale the whole top up, which loosens the fabric and increases both width and length.
- Smaller
- Drop to a smaller hook, or repeat fewer pairs of the alpine stitch and single crochet rows before starting the bust decrease, which shortens the body before shaping begins.
Photographs of this one
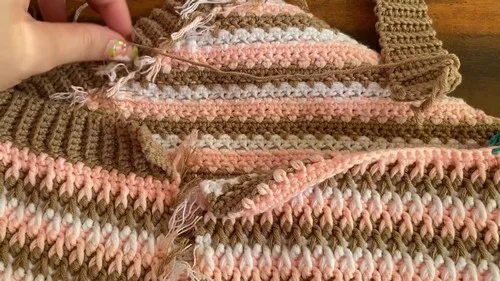
Every photograph on this page was taken by whoever published the pattern, and they are printed in the order the source listed them.
FAQs
Asked and answered
These answers came from whoever first published the pattern, kept word for word.
What does the alpine stitch actually look like once finished?
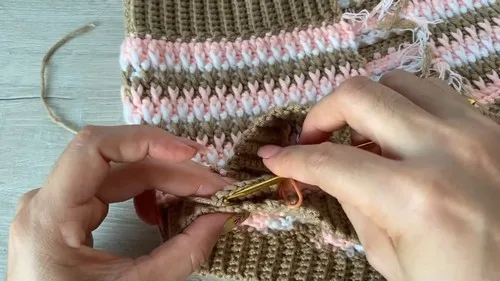
The front post double crochet sits raised above the surrounding single crochet rows, giving a ribbed, textured band across the body. It reads as a subtle horizontal pattern rather than a bold motif.
Can the straps be made longer than the pattern gives?
Yes, the strap row is a repeat worked until the desired length, so more rows can be added before fastening off. Just keep both straps worked the same number of rows so they match.
Is it necessary to change yarn color at all?
No, the color change at the end of a single crochet row is optional and only affects the look of the stripes. Working the whole top in one color is just as valid.
Why does the cord need to reach a specific length?
The cord is worked until it measures long enough to thread through the holes at the bottom and tie off with room to spare. A shorter cord will not pull the hem in evenly.