 STITCH ROUND
 Crochet gingerbread house pattern with step-by-step walls and roof
13 rounds to tick off build this crocheted gingerbread house with roof, walls, and shingles.
- Skill
- Intermediate
- Rounds
- 13 rounds
- Yarn weight
- Fingering
- Hook
- 3 mm
- Time
- 6-8 hours

Intermediate
What the original page called it. Nothing here is graded a second time.

13 rounds
Each one gets its own line, with a box beside it to tick as you go.

Fingering
What the sample was made in. Any weight works — the size moves with it.
About this pattern
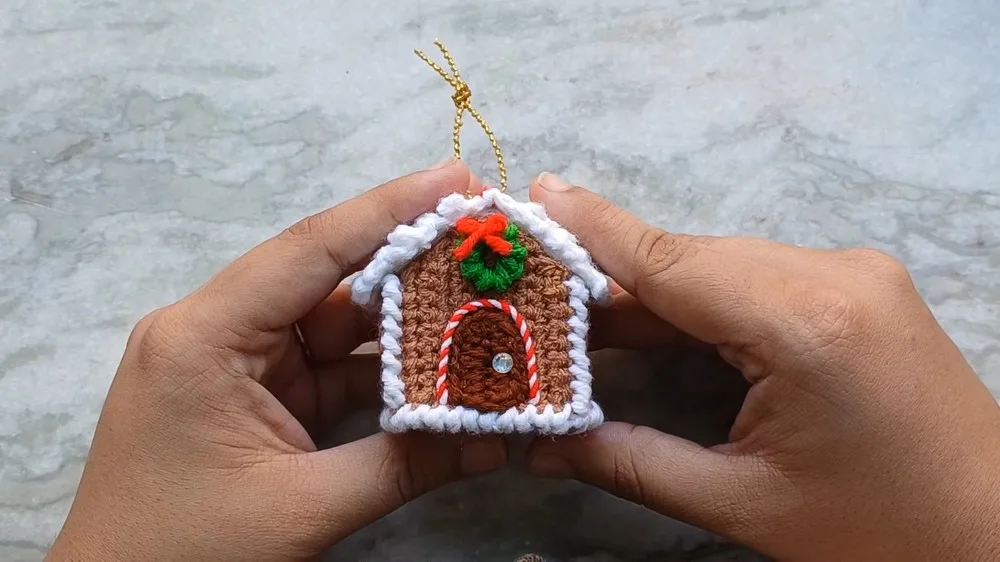
This crocheted gingerbread house is built from two main pattern parts: a Material and construction section covering nine rounds, and a second shingle section worked over four rounds. Four matching side walls, a base, and a roof come together from light brown, dark brown, red, green, and white yarn, with a golden thread loop, a rhinestone doorknob, and cardboard reinforcement finishing the build. Ticking off both parts in order gives a complete, display-ready house rather than a quick one-sitting project.
- Start by crocheting four matching side walls in light brown yarn, following the same row count throughout.
- Build the roof shingles separately, using picot rows that are later staggered for a layered look.
- Work the base chain in white yarn before joining it to the walls with reverse single crochet.
- Reinforce the walls with cardboard glued inside before sewing the structure together.
- Attach the roof using fabric glue, then stitch along the top edge with red yarn for a candy cane effect.
- Finish by decorating the walls and roof with doors, wreaths, and windows before final assembly.
What goes wrong
- Picots pulled too tight Keep the slip stitch loop loose when forming each picot so the little loop stands out instead of flattening into the row.
- Mixing up front and back loops Check each shingle row for whether it calls for back loops only or front loops, since the pattern alternates between the two to create the staggered effect.
- Skipping cardboard reinforcement Glue the cardboard into each wall and roof panel before sewing pieces together, otherwise the house loses its shape under its own weight.
- Joining base with plain single crochet Use reverse single crochet to join the base to the walls as directed, which keeps the seam neat and matches the row and stitch alignment.
Yarn, hook and the rest
Copied from the source pattern's own materials list.
- Light brown, dark brown, red, green, and white yarn (4-ply/fingering weight)
- 3 mm crochet hook
- Yarn needle
- Golden thread (for the ornament loop)
- Silver rhinestone (for the doorknob)
- Thin cardboard (like from a cereal box)
- Fabric glue
- Regular school glue
- Scissors
Progress tracker
0 of the 13 rounds on this page are ticked.
The pattern, round by round
Kept in the order and the wording the source used. Tick a round as you finish it; the ticks stay on this device.
Material
Side Wall Pattern (Make 4): Start with light brown yarn.
Row 1
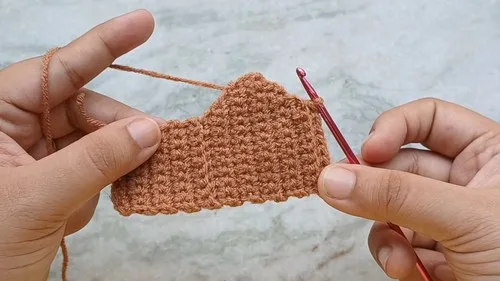
Chain 9 (8 + 1 for turning), skip the first chain, make a single crochet into each of the next 8 chains. You'll have 8 single crochets.For Row 2: Chain 1 (turning chain), turn, make 1 single crochet into each stitch across.Rows 3-8: Repeat Row 2.Front Wall Pattern: Follow the Side Wall Pattern until Row 8.
Row 9
Chain 1, turn, work into the back loops only, make a single crochet into the back loops of the first 7 stitches, increase in the last stitch (9 single crochets now).
Row 10
Chain 1, turn, increase in the first stitch, single crochet in the next 8 stitches (10 single crochets now).For Row 11: Chain 1, turn, single crochet in the first 9 stitches, increase in the last stitch (11 single crochets now).
Row 12
Chain 1, turn, increase in the first stitch, single crochet in the next 10 stitches (12 single crochets now).
Row 13
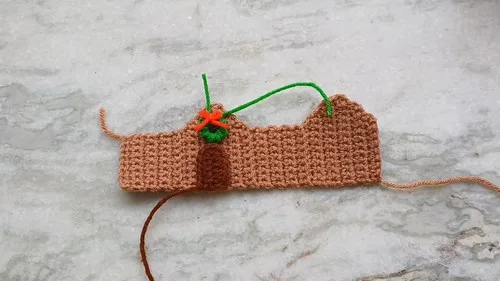
Chain 1, turn, single crochet in the first 11 stitches, increase in the last stitch (13 single crochets now).For Row 14: Chain 1, turn, decrease over the first two stitches, single crochet in the next 11 stitches (12 single crochets now).
Row 15
Chain 1, turn, single crochet in the first 10 stitches, decrease over the last two stitches (11 single crochets now).
Row 16
Chain 1, turn, decrease over the first two stitches, single crochet in the next 9 stitches (10 single crochets now).For Row 17: Chain 1, turn, single crochet in the first 8 stitches, decrease over the last two stitches (9 single crochets now).
Row 18
Chain 1, turn, decrease over the first two stitches, single crochet in the next 7 stitches (8 single crochets now).
Row 19
Chain 1, turn, work into the back loops only of the 8 stitches (starting the next side wall).
Part 2
Roof Pattern (Make 2): With white yarn, chain 11.
Row 1
Starting from the second chain from the hook, make one single crochet into each chain.
Row 2
Turn, work into the back loops only, chain 3, slip stitch into the third chain from the hook to form a picot (shingle), skip a stitch, slip stitch, repeat to create five picots.For Row 3: Chain 1, turn, single crochet into the front loops of Row 1 (not covered by picots).
Row 4
Turn, stagger the picots by slip stitching into the back loop of the first stitch, picot, repeat to create four picots.
Row 5
Chain 1, turn, single crochet into the front loops left from Row 3. Repeat Rows 2 to 5 once more, then finish with a row of picots, working under both loops as it's the last row.Base Pattern: Chain 8 + 1, then make 10 rows of single crochets.
Join
Step 1Join the base to the walls with reverse single crochets, matching rows and stitches.
Step 2Sew the walls together and reinforce with cardboard coated with glue.
Step 3Attach the roof using fabric glue and sew across the top edge with red yarn to create a candy cane effect.
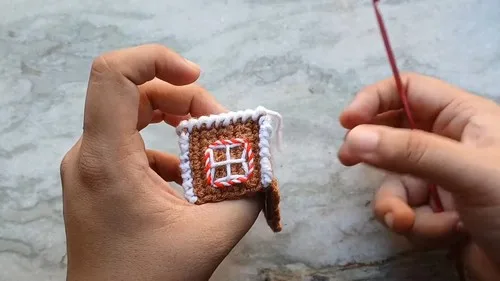
Step 4Decorate the walls and roof with additional components like doors, wreaths, and windows before assembly for easier handling.
Step 5The door is made with dark brown yarn by chaining 7 and then working half-double crochets, creating a small rectangular panel.
Step 6A wreath is crafted using green yarn and reverse single crochets around a ring formed by chaining and joining.
Step 7Candy cane stripes around the door and windows are made by twisting red and white yarn strands together.
Check your count
- Material · Row 10: 10 sts
- Material · Row 13: 13 sts
- Material · Row 16: 10 sts
- Material · Row 18: 8 sts
Finish
- Weave in all yarn ends from the side walls, base, and roof panels before gluing anything together.
- Glue cardboard reinforcement inside the walls and roof panels, then press flat until the glue sets completely.
- Sew the roof seam closed with red yarn for the candy cane effect, then thread and knot the golden loop for hanging.
Bigger or smaller
- Larger
- Swap in a heavier yarn with a correspondingly larger hook than the 3 mm used here; the whole house grows in scale while every row count stays the same.
- Taller roof
- Repeat the picot shingle rows an extra round before finishing with the under-both-loops row, adding more layered texture and height to the roof alone.
Photographs of this one
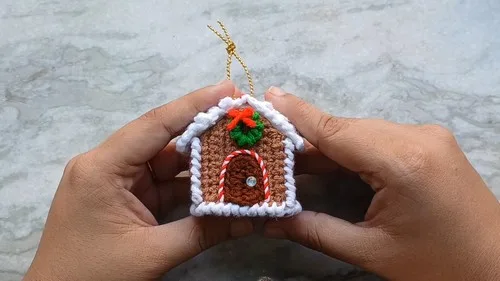
Every photograph on this page was taken by whoever published the pattern, and they are printed in the order the source listed them.
FAQs
Asked and answered
These answers came from whoever first published the pattern, kept word for word.
What yarn weight works best for this gingerbread house?
The pattern uses 4-ply (fingering) yarn with a 3 mm hook, which keeps the stitches tight enough for a sturdy structure. Any fingering-weight yarn in light brown, dark brown, red, green, and white will work the same way.
Why does the roof need cardboard reinforcement?
Crocheted panels alone are too soft to hold the peaked roof shape, so thin cardboard coated with glue stiffens each wall and roof piece before assembly. This keeps the house standing upright instead of collapsing under its own weight.
How are the picot shingles formed?
Each shingle starts as a short chain with a slip stitch back into the chain to form a small loop, repeated across the row to build a line of shingles. Alternating rows worked into back loops then front loops let the shingles stagger and overlap like a real roof.
What is the golden thread loop for?
It gets attached during finishing to create a loop for hanging the completed house as an ornament. Thread it through and knot it before the final seams are closed so it stays anchored.