 STITCH ROUND
 Crocheted seashell jewelry holder pattern with lined panels
Four rounds per panel build a plush seashell dish for rings and earrings.
- Skill
- Intermediate
- Rounds
- 4 rounds
- Yarn weight
- Worsted
- Hook
- 4.5 mm
- Time
- 4-6 hours

Intermediate
What the original page called it. Nothing here is graded a second time.

4 rounds
Each one gets its own line, with a box beside it to tick as you go.

Worsted
What the sample was made in. Any weight works — the size moves with it.
About this pattern
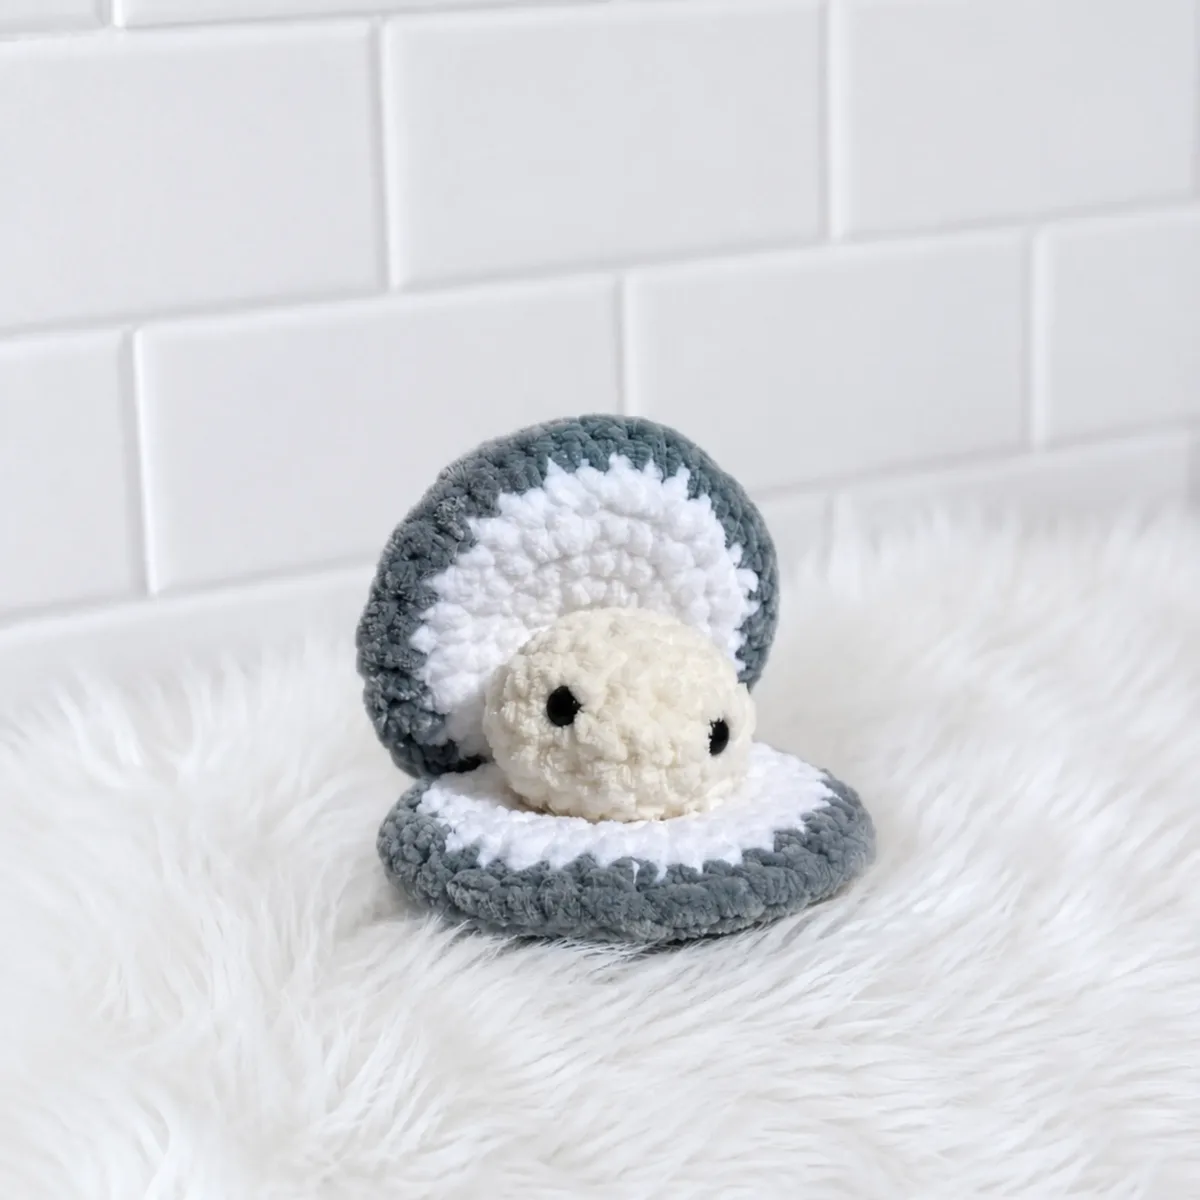
This seashell dish starts as a flat panel, four rounds worked outward from a magic ring, and there are four panels total to tick off before anything gets joined. Two go in blue for the outer shell, two in white for the lining that shows on the inside. Plush velvet yarn gives the finished piece a soft, tactile shell-like texture that plain worsted cotton would not match.
Each panel grows the same way every round: a ring of six stitches, then evenly spaced increases that push the circle wider and flatter. The moment to slow down is the last round or two, where the increase spacing spreads out and it gets easy to lose count in a continuous spiral. A stitch marker on the first stitch of each round keeps the increase points lined up instead of spiraling off-center.
- Crochet four flat panels in the round, two in blue yarn and two in white, each starting from a magic ring.
- Pair one blue panel with one white panel and hold them wrong sides together so the white lining faces inward.
- Whipstitch around most of the outer edge through the outermost loops of both panels to close the first pair.
- Tuck a small pearl bead or crocheted pearl figure inside before the seam is fully closed.
- Repeat the pairing and whipstitching with the remaining blue and white panels for the second shell.
- Weave in the yarn tails so the shell sits flat and ready to hold small jewelry.
What goes wrong
- Loose magic ring center Pull the ring closed firmly before working past round 1, or the panel center will show a visible hole under the velvet nap.
- Losing place in the spiral Clip a stitch marker into the first stitch of every round and move it up each time, since there is no join to mark the round's end.
- Uneven increase spacing Count stitches between increases as each round widens the panel, so the disc lies flat instead of cupping or rippling at the edge.
- Seaming through the wrong loops Catch only the outermost loops of both panels when whipstitching, and check the white lining faces in before the first stitch goes in.
Yarn, hook and the rest
Copied from the source pattern's own materials list.
Yarn
- Alize Velluto plush velvet yarn (or any comparable #4 Worsted weight velvet yarn) in blue and white
Hook
- US Size G-6 / 4.5 mm or H-8 / 5 mm
Safety Eyes
- 7–9 mm, qty. 2 (for the optional pearl figure)
- Tapestry Needle
- Scissors
Optional
- Small decorative pearl bead or crocheted pearl figure for the interior
Progress tracker
0 of the 4 rounds on this page are ticked.
The pattern, round by round
Kept in the order and the wording the source used. Tick a round as you finish it; the ticks stay on this device.
Shell Panel — Make 2 in Blue Yarn (Outer Shell)
Round 1
6 sc in MR. Pull ring closed tight. (6)
Round 2
inc in each st around. (12)
Round 3
(1 sc, inc) × 6. (18)
Round 4
(2 sc, inc) × 6. (24)Step by step: Fasten off, leaving a long yarn tail for seaming.Fasten off, leaving a long yarn tail for seaming.
Join
Step 1Pair the panels. Take one blue panel and one white panel. Hold them with wrong sides facing each other — the white panel facing inward (this will be the visible lining) and the blue panel facing outward.
Step 2Seam the first half. Using your tapestry needle and the yarn tail from either panel, whipstitch around the entire outer edge to join the blue and white panels together. Work through the outermost loops of both panels simultaneously. Fasten off and weave in all ends. This is your first shell half. Repeat with the remaining blue and white panels to create the second shell half.
Step 3Create the hinge. Hold both completed shell halves together with their white (inner) sides facing each other. Using a fresh length of yarn and your tapestry needle, seam the two halves together through 5–6 stitches only along one edge. This partial seam is your hinge — it allows the shell to open and close freely. Do not seam the remaining edge; it must stay open.
Step 4Attach the optional pearl. If including a pearl figure or decorative bead, position it on the white inner surface of the bottom shell half. Sew it down securely using your tapestry needle and a short length of matching yarn.
Step 5Weave in all remaining ends.
Check your count
- Shell Panel — Make 2 in Blue Yarn (Outer Shell) · Round 1: 6 sts
- Shell Panel — Make 2 in Blue Yarn (Outer Shell) · Round 2: 12 sts
- Shell Panel — Make 2 in Blue Yarn (Outer Shell) · Round 3: 18 sts
- Shell Panel — Make 2 in Blue Yarn (Outer Shell) · Round 4: 24 sts
Finish
- Weave in the tail left at the start of each magic ring so no loose loop shows at the center of the panel.
- Before the whipstitch seam closes completely, slip the decorative pearl or crocheted pearl figure into the gap between the blue and white panels.
- Finish the whipstitch around the remaining edge, then weave the seaming tail in on the inside so the lining stays smooth to the touch.
Bigger or smaller
- Smaller
- Drop down to the smaller end of the hook range with a tightly spun worsted yarn, which pulls the same rounds in tighter for a more compact panel.
FAQs
Asked and answered
These answers came from whoever first published the pattern, kept word for word.
Can a plain bead replace the crocheted pearl figure?
Yes. The pattern lists a small decorative pearl bead as an alternative to the crocheted pearl figure, and either sits the same way inside the seam.
Why work the panels in two different yarn colors?
The blue panel forms the outer shell that shows, while the white panel becomes the interior lining once the two are joined wrong sides together. Swapping either color changes the look without changing the shaping.
Does the yarn have to be velvet weight?
The pattern calls for a plush velvet worsted-weight yarn for its texture, but any comparable worsted weight yarn works with the same hook sizes. A smooth worsted yarn will lose the velvet finish but keep the same panel size.
What keeps the spiral rounds from twisting?
A stitch marker placed in the first stitch of each round and moved up every round is the key tool, since the rounds are never joined. Without it the increase points can drift and the panel loses its flat, even shape.