 STITCH ROUND
Sage green botanical lace belt crochet pattern
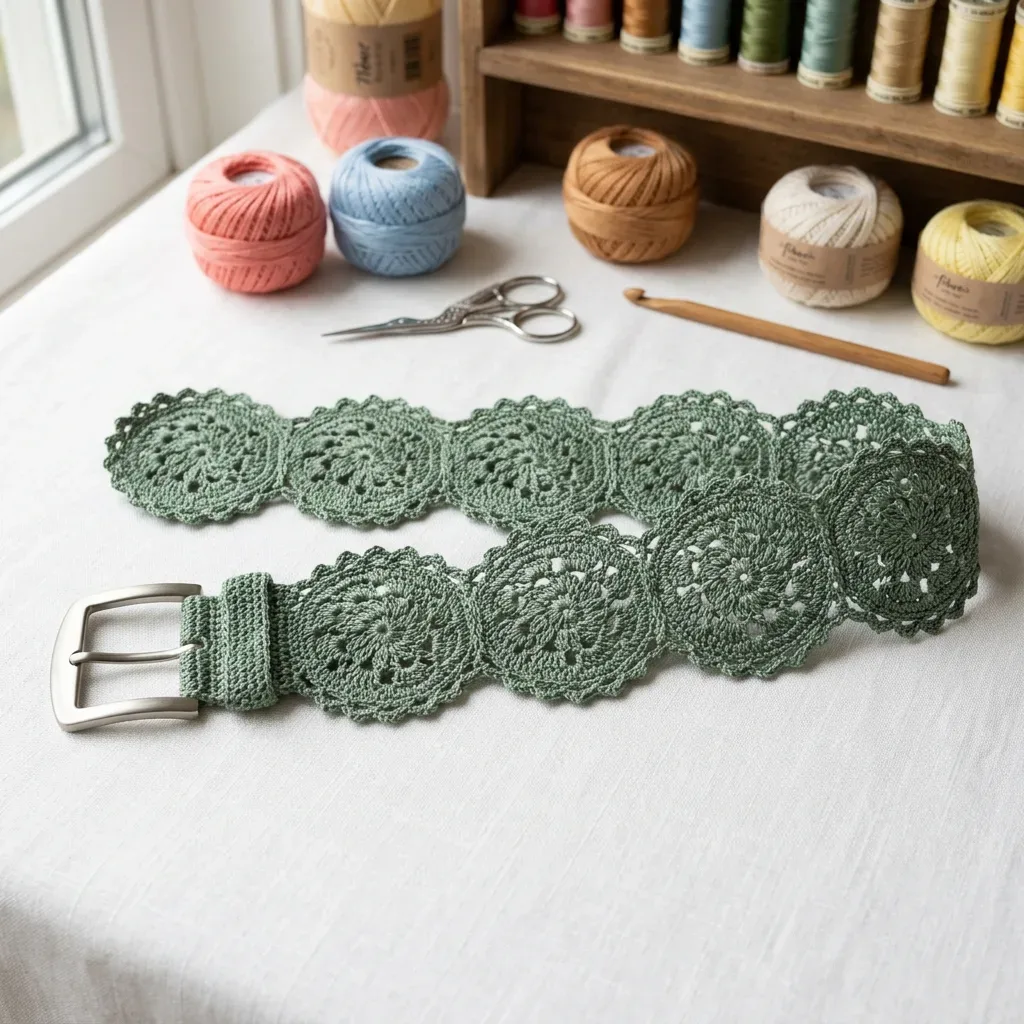
Seven rounds build each medallion in this sage green botanical lace crochet belt.
- Skill
- Intermediate
- Rounds
- 11 rounds
- Yarn weight
- Lace / Size 10 Thread
- Hook
- 1.8 mm
- Time
- 6-10 hours

Intermediate
What the original page called it. Nothing here is graded a second time.

11 rounds
Each one gets its own line, with a box beside it to tick as you go.

Lace / Size 10 Thread
What the sample was made in. Any weight works — the size moves with it.
About this pattern
This belt is built from seven lace medallions joined edge to edge, each one worked over the same seven rounds before locking into the next. A separate buckle strap tab, worked over its own three rounds, finishes the piece and threads through the clasp. Ticking off one medallion at a time keeps the project manageable even though the finished band runs to a full belt length.
The shaping stays consistent medallion to medallion: six rounds build the open lace body, then the seventh round both finishes the edge and joins it to the piece before it. Slow down on that joining round, since the picots have to land on the correct two adjacent picots of the previous medallion or the whole belt will twist out of line. The buckle strap and optional eyelet strap are where exact stitch placement also matters most.
One completed medallion through Round 7 should measure 3.5 inches (9 cm) in diameter after blocking. Since the belt length comes from joining multiple medallions, even a small size difference per medallion adds up quickly across seven of them. Work one full medallion, block it flat, and measure across the widest point. If your medallion is larger than 3.5 inches, go down a hook size. If it's smaller, go up a hook size.
Each medallion: approximately 3.5 inches (9 cm) in diameter. Belt total length with 7 medallions: approximately 27 inches (68.5 cm), not including any buckle strap tail for adjustment. Buckle strap tab: approximately 2.5 inches (6.5 cm) long by 1.25 inches (3 cm) wide. Belt width: approximately 3.5 inches (9 cm).
- Work each medallion through its identical opening rounds before reaching the round that joins it to its neighbor.
- Connect every new medallion by joining picots on its final round directly to the previous medallion's outer picots.
- Repeat the same join across all seven medallions to build the belt body lengthwise, one petal section at a time.
- Work the buckle strap tab as its own narrow single crochet piece attached to the first medallion for threading through the clasp.
- Add an optional eyelet strap to the last medallion if the belt needs holes instead of a buckle closure.
- Wet block the finished belt flat so the picots and open lace spaces hold their shape permanently.
What goes wrong
- Using the wrong steel hook size Steel hook sizing runs opposite to regular hooks, so confirm a US size 7 (1.65 mm) hook before starting, not a hook that merely looks similar in size.
- Skipping the wet blocking step The lace only opens up and the picots only lie flat after the belt is submerged, pressed, and pinned on a blocking mat. Skipping this leaves the stitches tight and uneven.
- Joining to the wrong picots Locate the two adjacent outer picots on the previous medallion's right edge before working the joining round. A misplaced join shifts every medallion after it out of alignment.
- Miscounting the eyelet row the eyelet row, work the chain-2 space and skipped stitches precisely, then catch that space with two single crochet on the following row so the eyelet stays even.
Yarn, hook and the rest
Copied from the source pattern's own materials list.
- Aunt Lydia’s Classic Crochet Thread Size 10 is widely available and comes in Sage or Soft Sage colorways that match the sample beautifully. At 350 yards per ball, one ball gives you plenty of room.
- DMC Petra Crochet Cotton Size 5 produces gorgeous stitch definition but runs slightly thicker. If you choose this option, switch to a US size 6 steel hook (1.8 mm) and swatch carefully.
- Lizbeth Egyptian Cotton Thread Size 10 is a premium choice known for smooth twist and vibrant color retention. You’ll need 3 balls at 122 yards each.
- Whatever you choose, avoid fuzzy or stretchy fibers. Lace demands crisp stitch definition to really shine.
Yarn
- Size 10 crochet cotton thread in your chosen color. You’ll need approximately 300 to 400 yards for a seven medallion belt plus the buckle strap. The sample uses a muted sage green, which reads as soft and botanical.
Hook
- US size 7 steel crochet hook, which is 1.65 mm. This is smaller than what many crocheters are used to, so double check you have the right one. Steel hook sizing runs opposite to regular hooks.
Notions
- Tapestry needle for weaving in ends
- Rust proof pins for blocking
- Spray bottle with water
- Foam blocking mat
- 1 rectangular metal belt buckle with center bar, 1.25 inches wide
Progress tracker
0 of the 11 rounds on this page are ticked.
The pattern, round by round
Kept in the order and the wording the source used. Tick a round as you finish it; the ticks stay on this device.
Medallion 1 (Worked Completely Without Joining)
This first medallion establishes your technique. Take your time here.
Pattern Notes All rounds are worked on the right side; do not turn at the end of rounds unless specifically instructed. Chain 3 at the beginning of a round counts as the first double crochet throughout this pattern. Leave a 6 inch tail at the beginning and end of every medallion for weaving in later. The construction order is: complete Medallion 1 fully, then work each subsequent medallion through Round 6 before joining it during Round 7. Blocking is not optional — the lace pattern needs blocking to open up and lie flat, or the belt will look bunched and underwhelming.
Starting Ring Make a magic ring, or chain 6 and join with slip stitch to form a ring.
Round 1
Chain 1 (does not count as a stitch), work 12 single crochet into the ring, join to first single crochet. (12 sc)
Round 2
Chain 1, single crochet in same stitch, chain 4, skip 1 stitch, [single crochet in next stitch, chain 4, skip 1 stitch] 5 times, join to first single crochet. (6 sc, 6 ch-4 spaces)
Round 3
Slip stitch into first chain 4 space, chain 3 (counts as first double crochet), work 4 more double crochet into same space (beginning shell made), chain 2, [shell into next chain 4 space, chain 2] 5 times, join to top of beginning chain 3. (6 shells of 5 dc each, 6 ch-2 spaces; 30 dc total)
Round 4
Slip stitch across to first chain 2 space, chain 1, single crochet in same chain 2 space, chain 5, [single crochet in next chain 2 space, chain 5] 5 times, join to first single crochet. (6 sc, 6 ch-5 spaces)
Round 5
Slip stitch into first chain 5 space, chain 3 (counts as first double crochet), work 6 more double crochet into same space (7 dc shell), chain 3, [7 double crochet into next chain 5 space, chain 3] 5 times, join to top of beginning chain 3. (6 shells of 7 dc each, 6 ch-3 spaces; 42 dc total)
Round 6
Chain 1, single crochet in same stitch (top of chain 3), single crochet in each of next 3 double crochet, chain 3, single crochet in next double crochet (center double crochet of shell), chain 3, single crochet in each of next 3 double crochet, single crochet in last double crochet of shell, [single crochet in each of next 3 double crochet of next shell, chain 3, single crochet in center double crochet, chain 3, single crochet in each of next 3 double crochet, single crochet in last double crochet of shell] 5 times, join to first single crochet. (48 sc, 12 ch-3 spaces)
Round 7
Slip stitch to first chain 3 space, chain 1, [single crochet in chain 3 space, picot, single crochet in same chain 3 space, chain 4, single crochet in next chain 3 space (center space), chain 4, single crochet in next chain 3 space, picot, single crochet in same space, chain 3] 6 times, join to first single crochet. Fasten off and weave in ends. (24 sc, 12 picots, 12 ch-4 spaces, 6 ch-3 spaces)
Checkpoint Your completed medallion should measure 3.5 inches across at its widest point after light blocking.
Buckle Strap Tab
The buckle strap is a narrow rectangle of single crochet rows that attaches to Medallion 1 and threads through your buckle.
Setup: With right side facing, join yarn with slip stitch to the bottom center area of Round 1 on Medallion 1. If the foundation ring isn’t easily accessible, create a separate strap instead: chain 9, single crochet in 2nd chain from hook and in each chain across. (8 sc)
Round 1
(RS): Chain 1, work 8 single crochet evenly along the medallion edge to establish strap width. (8 sc)
Round 2
Chain 1, turn, single crochet in each stitch across. (8 sc)
Round 3
through 16: Repeat Row 2. (8 sc each row) After Row 16, your strap should measure approximately 2.5 inches in length.Fasten off, leaving a 12 inch tail for sewing.Assembly: Thread the strap through the center bar of your belt buckle. Fold the strap back on itself and use your tapestry needle and tail to whipstitch the folded end securely to the back of Row 1. The buckle bar should sit snug inside the fold. Weave in all remaining ends.
Medallion 2 (Joined to Medallion 1 During Round 7)
Before you begin, identify where you’ll join. Look at your completed Medallion 1 lying flat. You’ll connect Medallion 2 at two adjacent outer picots on the right edge of Medallion 1. These two picots are in the same petal section.
Rounds 1 through 6: Work exactly as Medallion 1.
Round 7
With Joining Work the first 3 full repeats with standard picots (these form the free, unjoined side): [Single crochet in chain 3 space, picot, single crochet in same chain 3 space, chain 4, single crochet in next chain 3 space, chain 4, single crochet in next chain 3 space, picot, single crochet in same space, chain 3] 3 times.Now work the joining repeat (the petal section facing Medallion 1):Single crochet in chain 3 space, join picot to the first target picot on Medallion 1, single crochet in same chain 3 space, chain 4, single crochet in next chain 3 space, chain 4, single crochet in next chain 3 space, join picot to the second target picot on Medallion 1, single crochet in same space, chain 3.
Complete the remaining 2 full repeats with standard picots:
[Single crochet in chain 3 space, picot, single crochet in same chain 3 space, chain 4, single crochet in next chain 3 space, chain 4, single crochet in next chain 3 space, picot, single crochet in same space, chain 3] 2 times.
Join to first single crochet. Fasten off and weave in ends.
Checkpoint: When both medallions are laid flat, they should sit side by side touching at their join points. No gap between them, no puckering. The belt band should lie flat and straight.
Medallions 3 Through 7
Repeat the Medallion 2 process for each subsequent medallion. Work Rounds 1 through 6 as written, then complete Round 7 joining to the previous medallion at its two right edge outer picots.
The joining repeat placement stays consistent: 3 free repeats, 1 joining repeat, 2 free repeats, join.
Final Checkpoint: Your assembled belt body should measure approximately 24.5 inches from the outer edge of Medallion 1 to the outer edge of Medallion 7. The band is approximately 3.5 inches tall.
Join
Step 1Blocking transforms this project from "nice crochet" to "actual lace." Do not skip this step.
Step 21. Weave in all ends on every medallion using your tapestry needle. Pull tails through the wrong side of stitches in at least two directions.
Step 32. Submerge the assembled belt in cool water for 10 to 15 minutes.
Step 43. Gently press out excess water without wringing. Roll the belt in a clean towel and press to remove more moisture.
Step 54. Lay the belt flat on your foam blocking mat. Pin each medallion into a perfect circle, pulling the picots outward to their full extent. The medallions should form a straight horizontal line with no gaps between joined picots.
Step 65. Allow to dry completely. This typically takes 12 to 24 hours depending on humidity.
Step 7Once dry, your lace will be significantly more open, crisp, and defined. This is when the botanical pattern truly emerges.
Check your count
- Medallion 1 (Worked Completely Without Joining) · Round 1: 12 sts
- Medallion 1 (Worked Completely Without Joining) · Round 3: 30 sts
- Medallion 1 (Worked Completely Without Joining) · Round 5: 42 sts
- Medallion 1 (Worked Completely Without Joining) · Round 7: 24 sts
- Buckle Strap Tab · Round 1: 8 sts
- Buckle Strap Tab · Round 2: 8 sts
Finish
- Weave in every tail on each medallion and on the buckle strap tab, running ends through stitches in at least two directions on the wrong side.
- Submerge the fully joined belt in cool water, then press out excess moisture and roll it in a towel without wringing.
- Pin the damp belt flat on a foam blocking mat, smoothing each medallion and picot into place before it dries.
Bigger or smaller
- Longer or shorter
- Join more or fewer medallions using the same picot joining process on each one's final round, extending or shortening the belt body before it reaches its full length.
FAQs
Asked and answered
These answers came from whoever first published the pattern, kept word for word.
Can this belt be resized to fit different waists?
Yes. Add or remove medallions before final assembly, and rely on the buckle strap plus an optional eyelet strap to fine-tune the fit without reworking any single medallion.
What thread gives the best result?
Aunt Lydia's Classic Crochet Thread Size 10 in Sage or Soft Sage matches the sample most closely. Lizbeth Egyptian Cotton Thread Size 10 works well too and holds color vividly over time.
Why does the pattern specify a steel hook?
A US size 7 steel hook (1.65 mm) keeps the open lace stitches tight enough to hold their shape and definition. Steel hook sizing runs opposite to regular hooks, so it is smaller than the number suggests.
How do the medallions connect without extra seaming?
Each medallion's final round joins its picots directly to the outer picots of the previous medallion as the round is worked. No separate seaming step is needed once the join is complete.