 STITCH ROUND
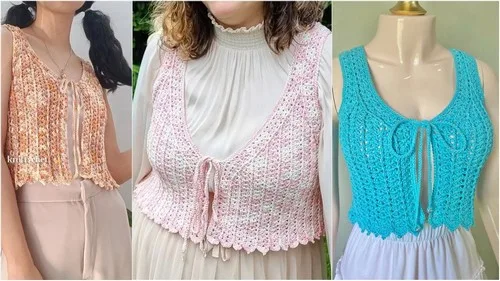
 Shell stitch crochet top pattern for every size
A shell-stitch crochet top pattern with rounds to tick off, from base chain to finishing, sized for every fit.
- Skill
- Intermediate
- Rounds
- 6 rounds
- Yarn weight
- Worsted
- Time
- 3-5 hours

Intermediate
What the original page called it. Nothing here is graded a second time.

6 rounds
Each one gets its own line, with a box beside it to tick as you go.

Worsted
What the sample was made in. Any weight works — the size moves with it.
About this pattern
This crochet top builds up through the Main Pattern's rounds, using shell stitches paired with single double crochet posts to create an open, textured panel. Starting on the sixth chain from the hook keeps the first row clear of bulky turning stitches, letting the fabric sit flat right from the start. Because the whole piece is worked from one repeating pattern block, ticking off each round moves the top from foundation chain to finished panel without any separate pieces to track.
Shaping comes from keeping the shells and posts stacked directly over the ones below, so each new row's shell lands in the chain-one space left by the last. Slow down at the start of every row, where the turning chain of two counts as the first double crochet and sets the position for the next shell. Rushing this step throws the post stitches out of line, and the panel's clean vertical channels wander instead of staying straight across all rounds.
- Start the foundation row from the sixth chain, alternating shell stitches with single post stitches across the length.
- Skip two chains between each shell and post so the spacing sets up the whole panel from the first row.
- Turn the work at the end of each row and use the chain-2 as the first double crochet going forward.
- Place each new shell into the chain-one space of the shell below to keep the columns lined up.
- Repeat the shell-and-post sequence row by row through the increase rows until front and back panels reach your desired length.
- Connect the front and back panels with calculated chains, then add single crochet edging and straps to finish the top.
What goes wrong
- Skipping the wrong chain count Count the skipped chains between each shell and post carefully before placing the next stitch. A single chain missed here throws off the spacing for every row that follows.
- Forgetting the turning chain counts as a stitch Treat the chain-2 at the start of each row as the first double crochet, not an extra stitch. Skipping this step shifts every shell one position off from the row below.
- Losing the post stitch alignment Check that each post stitch sits directly above the post from the previous row before moving on. Drifting posts pull the whole panel out of its straight vertical lines.
- Confusing the chain-1 and chain-2 spaces Remember the chain-1 inside each shell is for the next shell, while the chain-2 at the row's edge is the turning chain. Mixing the two moves the shell pattern off center.
Yarn, hook and the rest
Copied from the source pattern's own materials list.
- Crochet hook
- Yarn
- Beads (optional, for strap decoration)
Progress tracker
0 of the 6 rounds on this page are ticked.
The pattern, round by round
Kept in the order and the wording the source used. Tick a round as you finish it; the ticks stay on this device.
Main Pattern
Base Chain
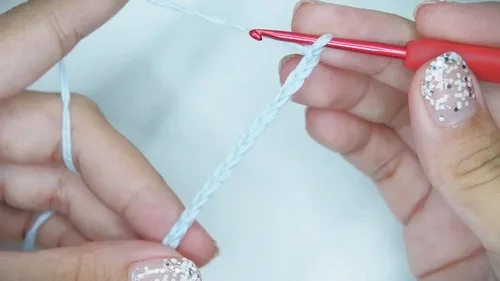
Start by making a slip knot. Chain 15. This beginning chain is suitable for all sizes.
Round 1
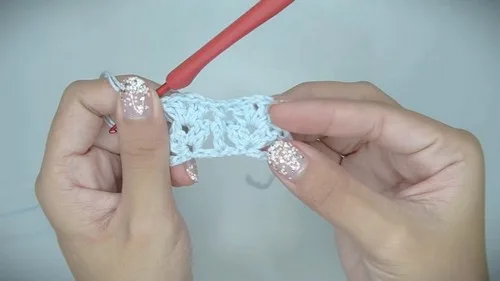
Start on the sixth chain from the hook and work a shell stitch. To make a shell stitch: 2 double crochet, chain 1, 2 double crochet in the same chain.Skip two chains and work a double crochet in the next chain - this will be your first post. Skip another two chains and work another shell stitch in the next chain. Finish with a skip of two chains and a double crochet in the very last chain.
Round 2
Begin with chain 2 (which counts as the first double crochet), flip your work. Work a shell stitch in the first chain-one space.Work a front post double crochet in the post from the previous row. Finish with a double crochet in the chain space from the previous row.
Rounds 3–13
Alternate Row 2’s pattern by changing the front post double crochet to a back post double crochet every other row. Continue with this pattern, ending on an odd row.
Round 14
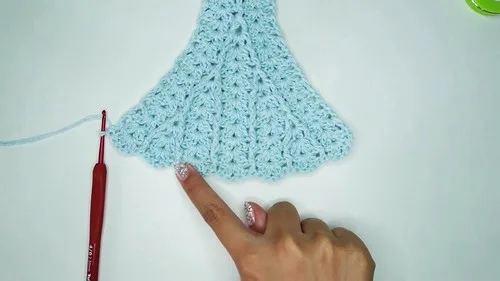
Increase Start Chain 2, flip your work. Make a shell in the first chain-one space.Work a front post V-stitch (front post double crochet, chain 1, front post double crochet) in the next post. Continue with a shell stitch and a double crochet in the final chain-one space.
Rounds 15–20
Alternate between back post double crochet and front post V-stitches, with shells in the chain-one spaces.Ensure to end with a double crochet in the chain-two space from previous rows.
Final Rows for Front Panel:
For extra small to small sizes, end increases at Row 26, and continue with a repeated pattern from Row 24 and Row 25 for your desired length. For larger sizes, continue increasing in the pattern of Row 22 and 23 until the width stretches to a quarter of your bust level circumference, then alternate with the pattern from Row 24 and 25.
Back Panel & Connecting Chains:
Work a mirror of the front panel adjustments for the back panel. To connect panels, make chains as calculated based on your total shell row count from the front panel. Begin connecting double crochet stitches and shell stitches across the chains to form the connecting piece between the front and back panels.
Final Edging & Straps:
Step by step: Once panels are connected, work single crochet stitches around the entire piece for edging. For straps, chain a length of 120 or more (to fit), slip stitch back along the chain, then continue with single crochet.
Completion:
Finish off by securing and weaving in ends. Optionally, add a bead at the end of each strap for decoration.
Finish
- Once the front and back panels are connected with chains and connecting stitches, work single crochet stitches around the entire piece for edging.
- straps, chain a length of 120 stitches or more to fit, slip stitch back along the chain, then continue with single crochet.
- Finish off by securing and weaving in every loose end. Optionally, add a bead at the end of each strap for decoration.
Bigger or smaller
- Larger
- Continue increasing in the pattern of Rows 22 and 23 until the width stretches to a quarter of your bust level circumference, then alternate with the pattern from Rows 24 and 25.
- Extra Small to Small
- End increases at Row 26, and continue with a repeated pattern from Rows 24 and 25 for your desired length.
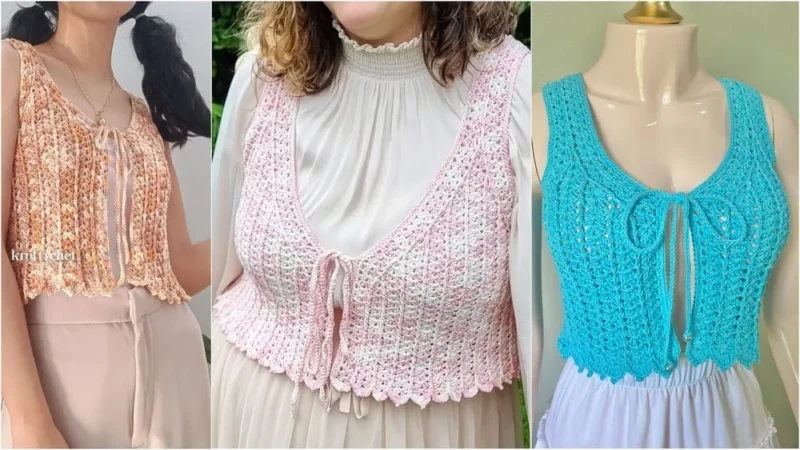
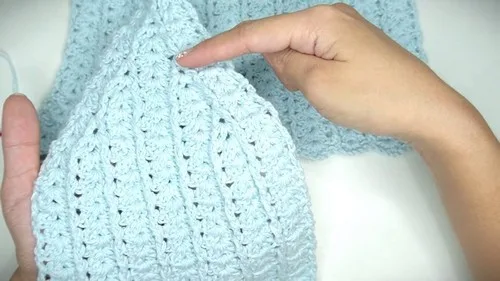
Photographs of this one
Every photograph on this page was taken by whoever published the pattern, and they are printed in the order the source listed them.
FAQs
Asked and answered
These answers came from whoever first published the pattern, kept word for word.
Does this top only come in one size?
The panel is worked from a repeating shell-and-post sequence, with extra rows of increasing added or repeated depending on your size. Extra small to small sizes stop increasing at Row 26, while larger sizes keep increasing until the width reaches a quarter of the bust circumference.
Is this a good pattern for someone new to shell stitch?
The shell stitch and post stitch alternate the same way across every row, so the sequence becomes familiar fast. Slowing down on the first row to get the spacing right makes the rest of the rows straightforward.
What yarn works best for this top?
The pattern calls for yarn and a crochet hook without specifying a particular weight, leaving room to match the yarn to the season. A lighter yarn suits a warm-weather top, while a heavier one gives a denser, cooler-weather panel.
Can this top be worn in any season?
The open shell stitch structure works for warmer weather, and swapping to a heavier yarn adapts the same panel for cooler months. Changing the yarn weight rather than the stitch pattern is the simplest way to shift the season it suits.